Buy 2 or more: $64.51 each
Have a Question? Ask Our Pros!
Average Rating
There are no reviews for this product yet. Be the first.
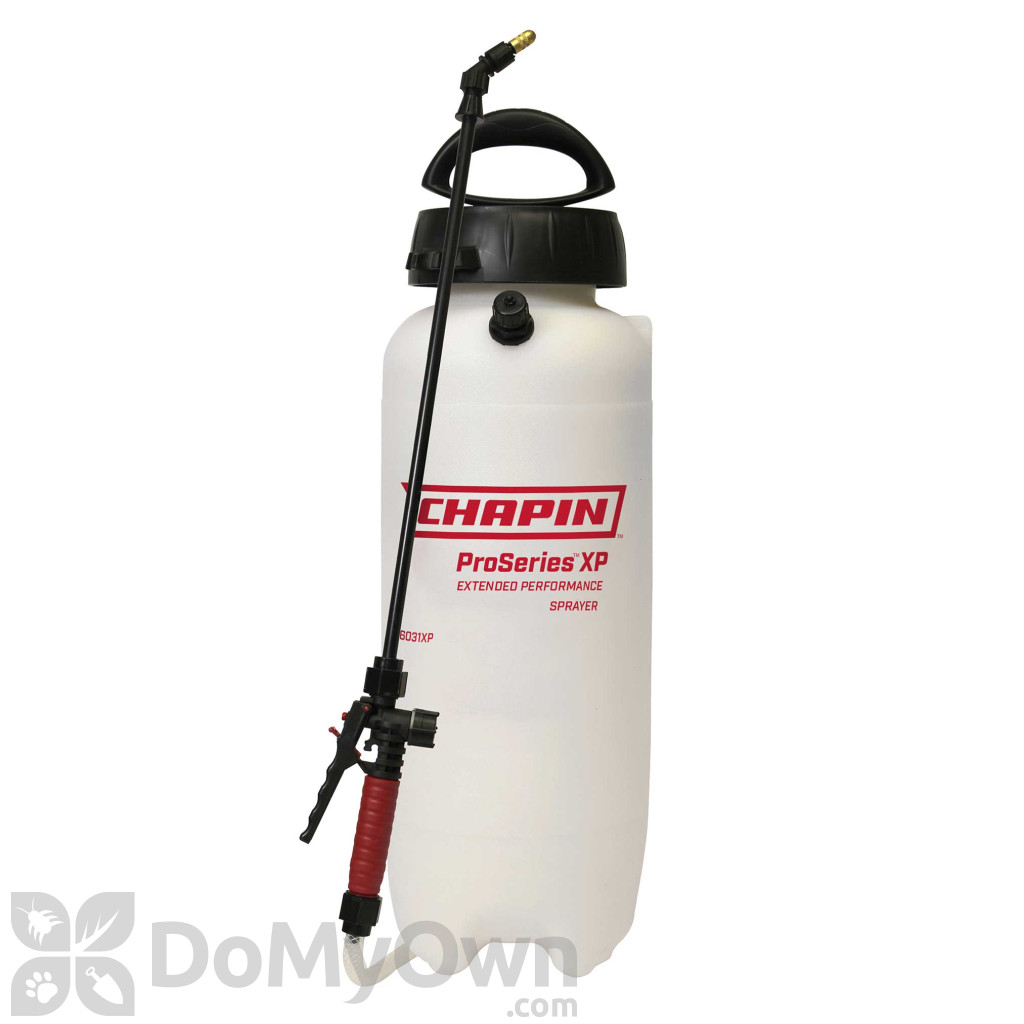
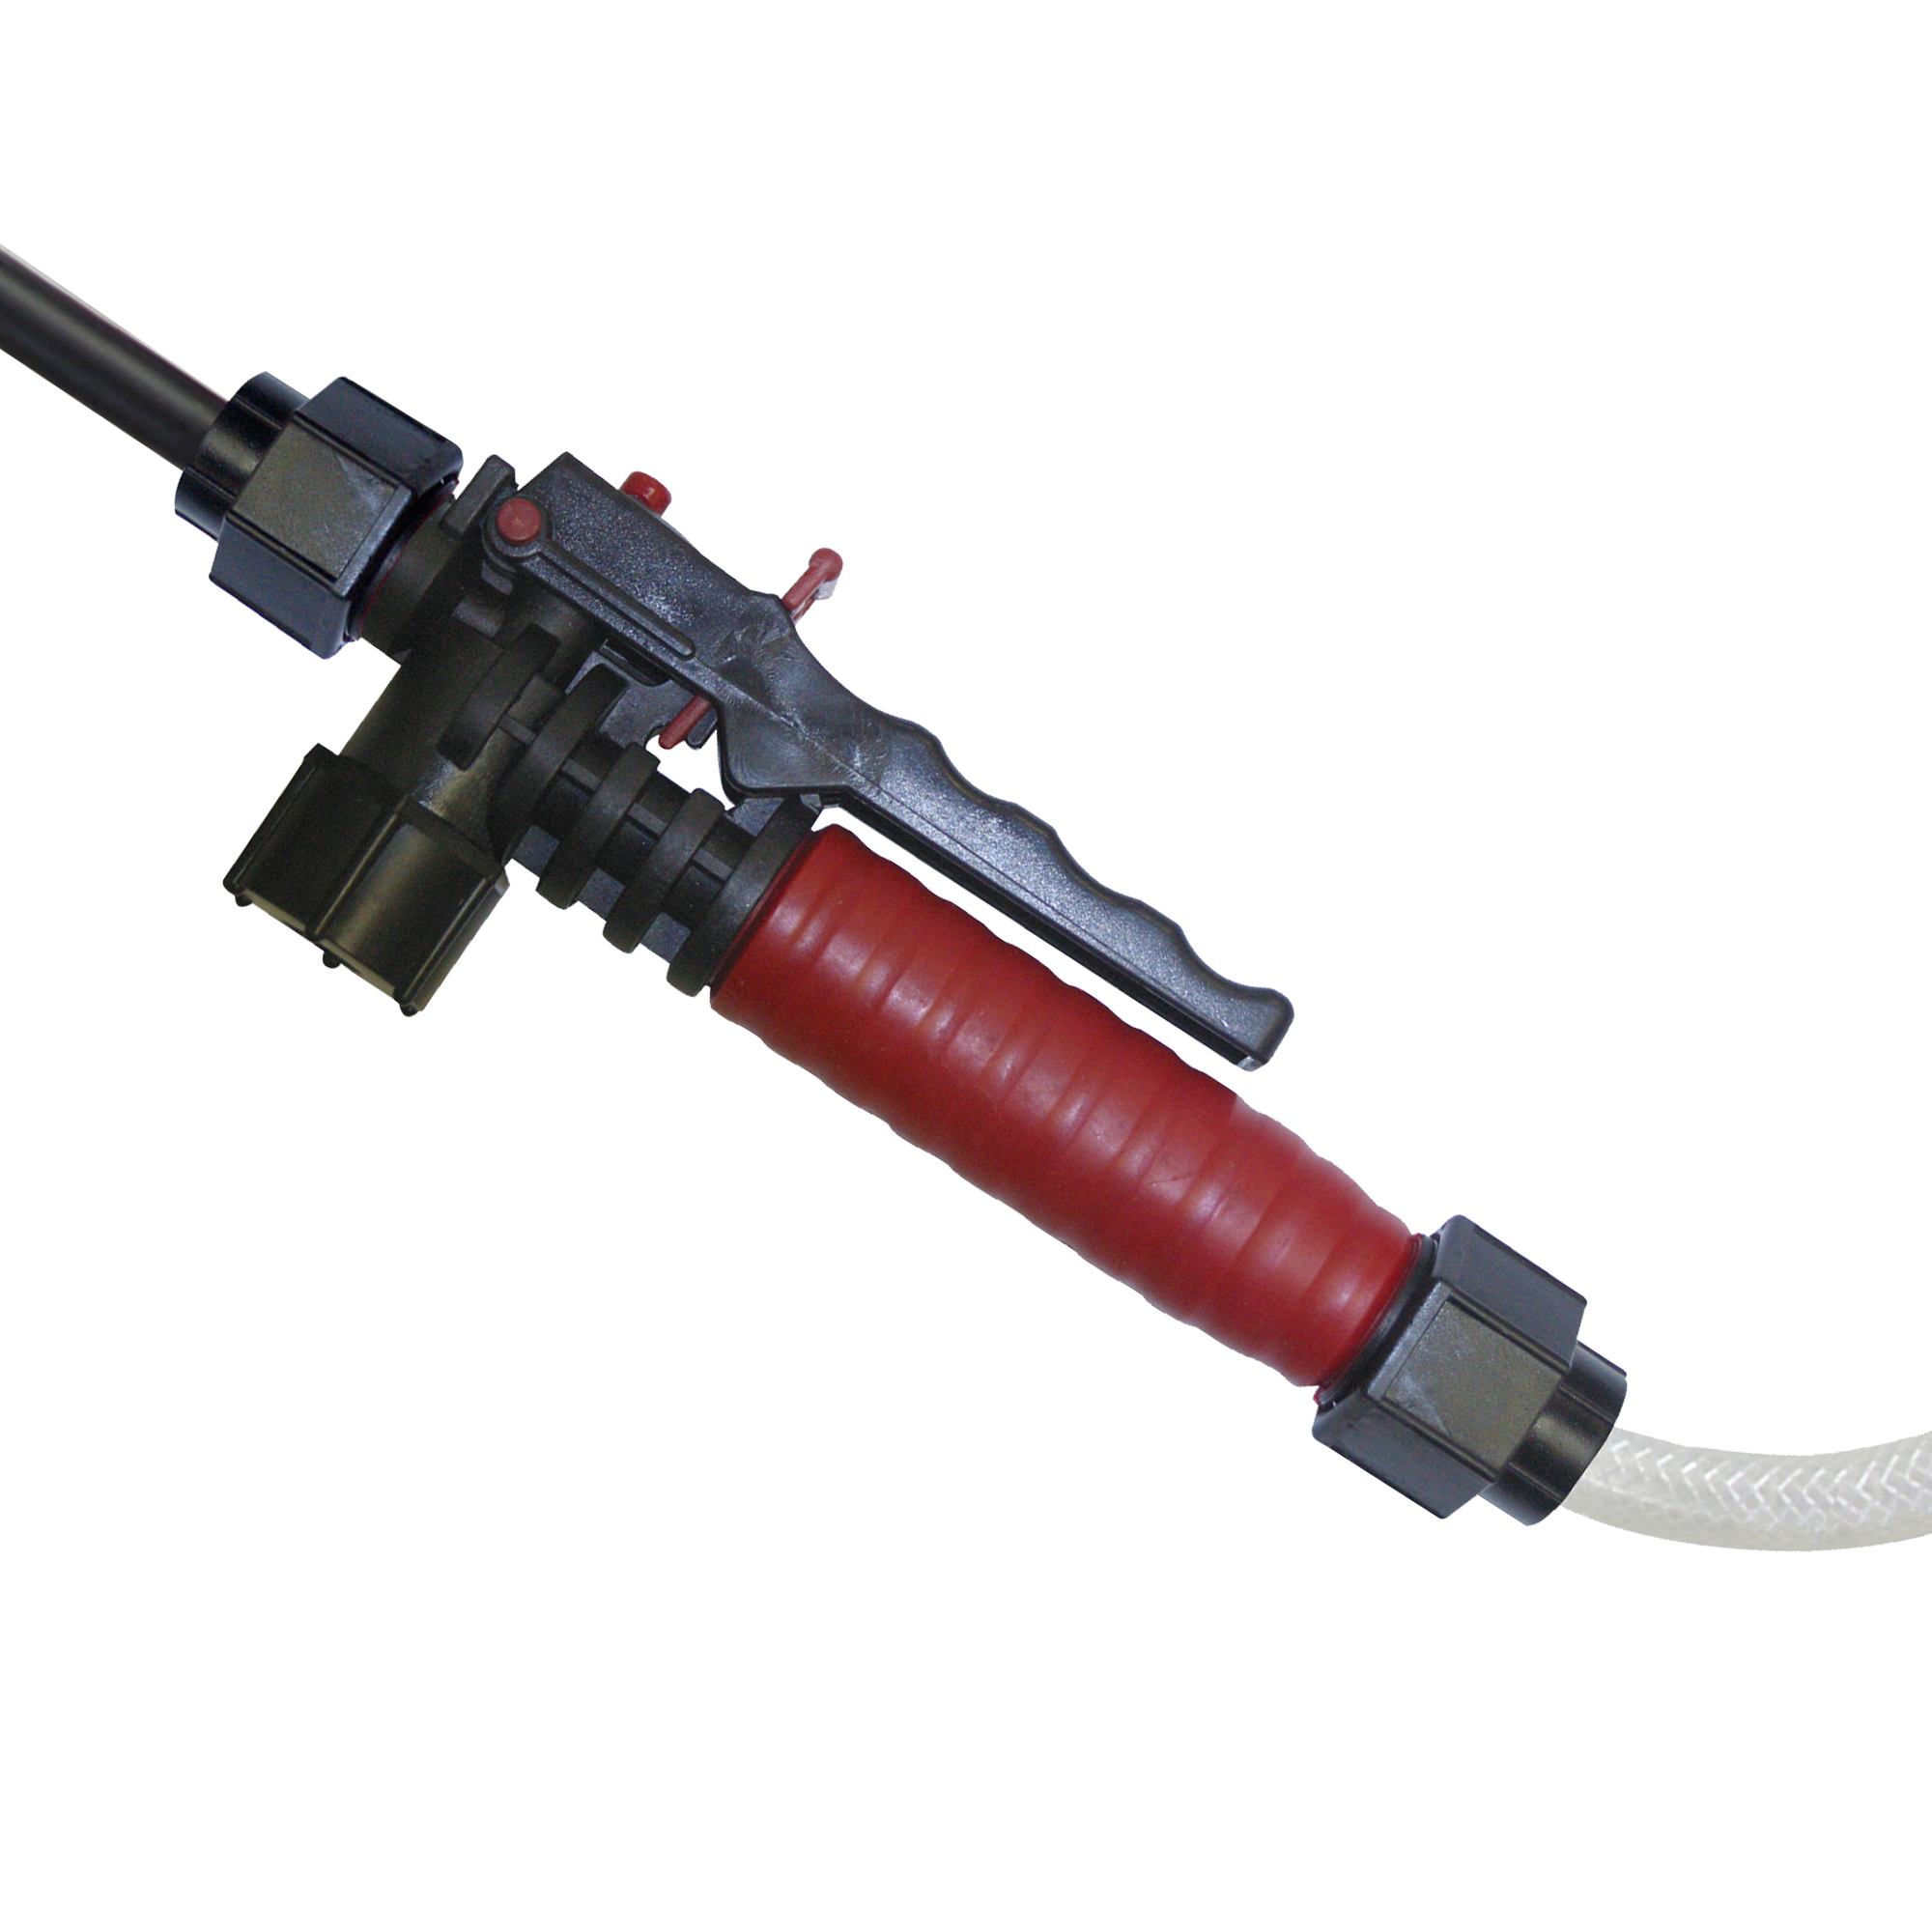
The Chapin Pro Series Sprayer 3 gallon (26031XP) is a poly sprayer that is designed for fertilizer, herbicide, fungicide and watering applications. It is well known for home and garden or lawn and landscaping industries. The Pro Series is enhanced with a reinforced hose and forty percent greater pump volume per stroke. It features a shut-off with stuffed cushion grip, built-in filter and Viton seals. The large open head measures four inches for convenience in filling and cleaning. The lightweight, translucent tank is made of polyethylene which is non-corrosive to most pesticides, fertilizers and herbicides. Other than that, the unit has an anti-clog filter which prevents debris from getting inside the hose, shut-off and nozzle.
Product Documents
| For use in | Home and garden, lawn and landscaping |
|---|---|
| Application | Fertilizers, fungicides, herbicides, watering |
| Dimensions | 8.40 x 8.40 x 25.80 |
| Sprayer Type | Hand Pump Sprayer |
| Tank Size (gal.) | 3 gal |
| Material / Construction | Polyethylene |
| Hose Length (in.) | 48 inches |
| Wand Length (in.) | 20 inches |
| Special Features |
40% more pump volume per stroke Equipped with Viton Seals in necessary key areas Viton is a brand of synthetic rubber and fluoropolymer elastomer commonly used in o-rings and other molded or extruded goods |
| Parts Included | Viton seals and gaskets, Cushion grip shut-off with internal filter, SureSpray Anti-clog Filter, Pressure relief valve |
| Shipping Weight | 6.10 lbs |
| Manufacturer | Chapin (Mfg. Number: 26031XP) |
| UPC | 00023883260316 |
Manual
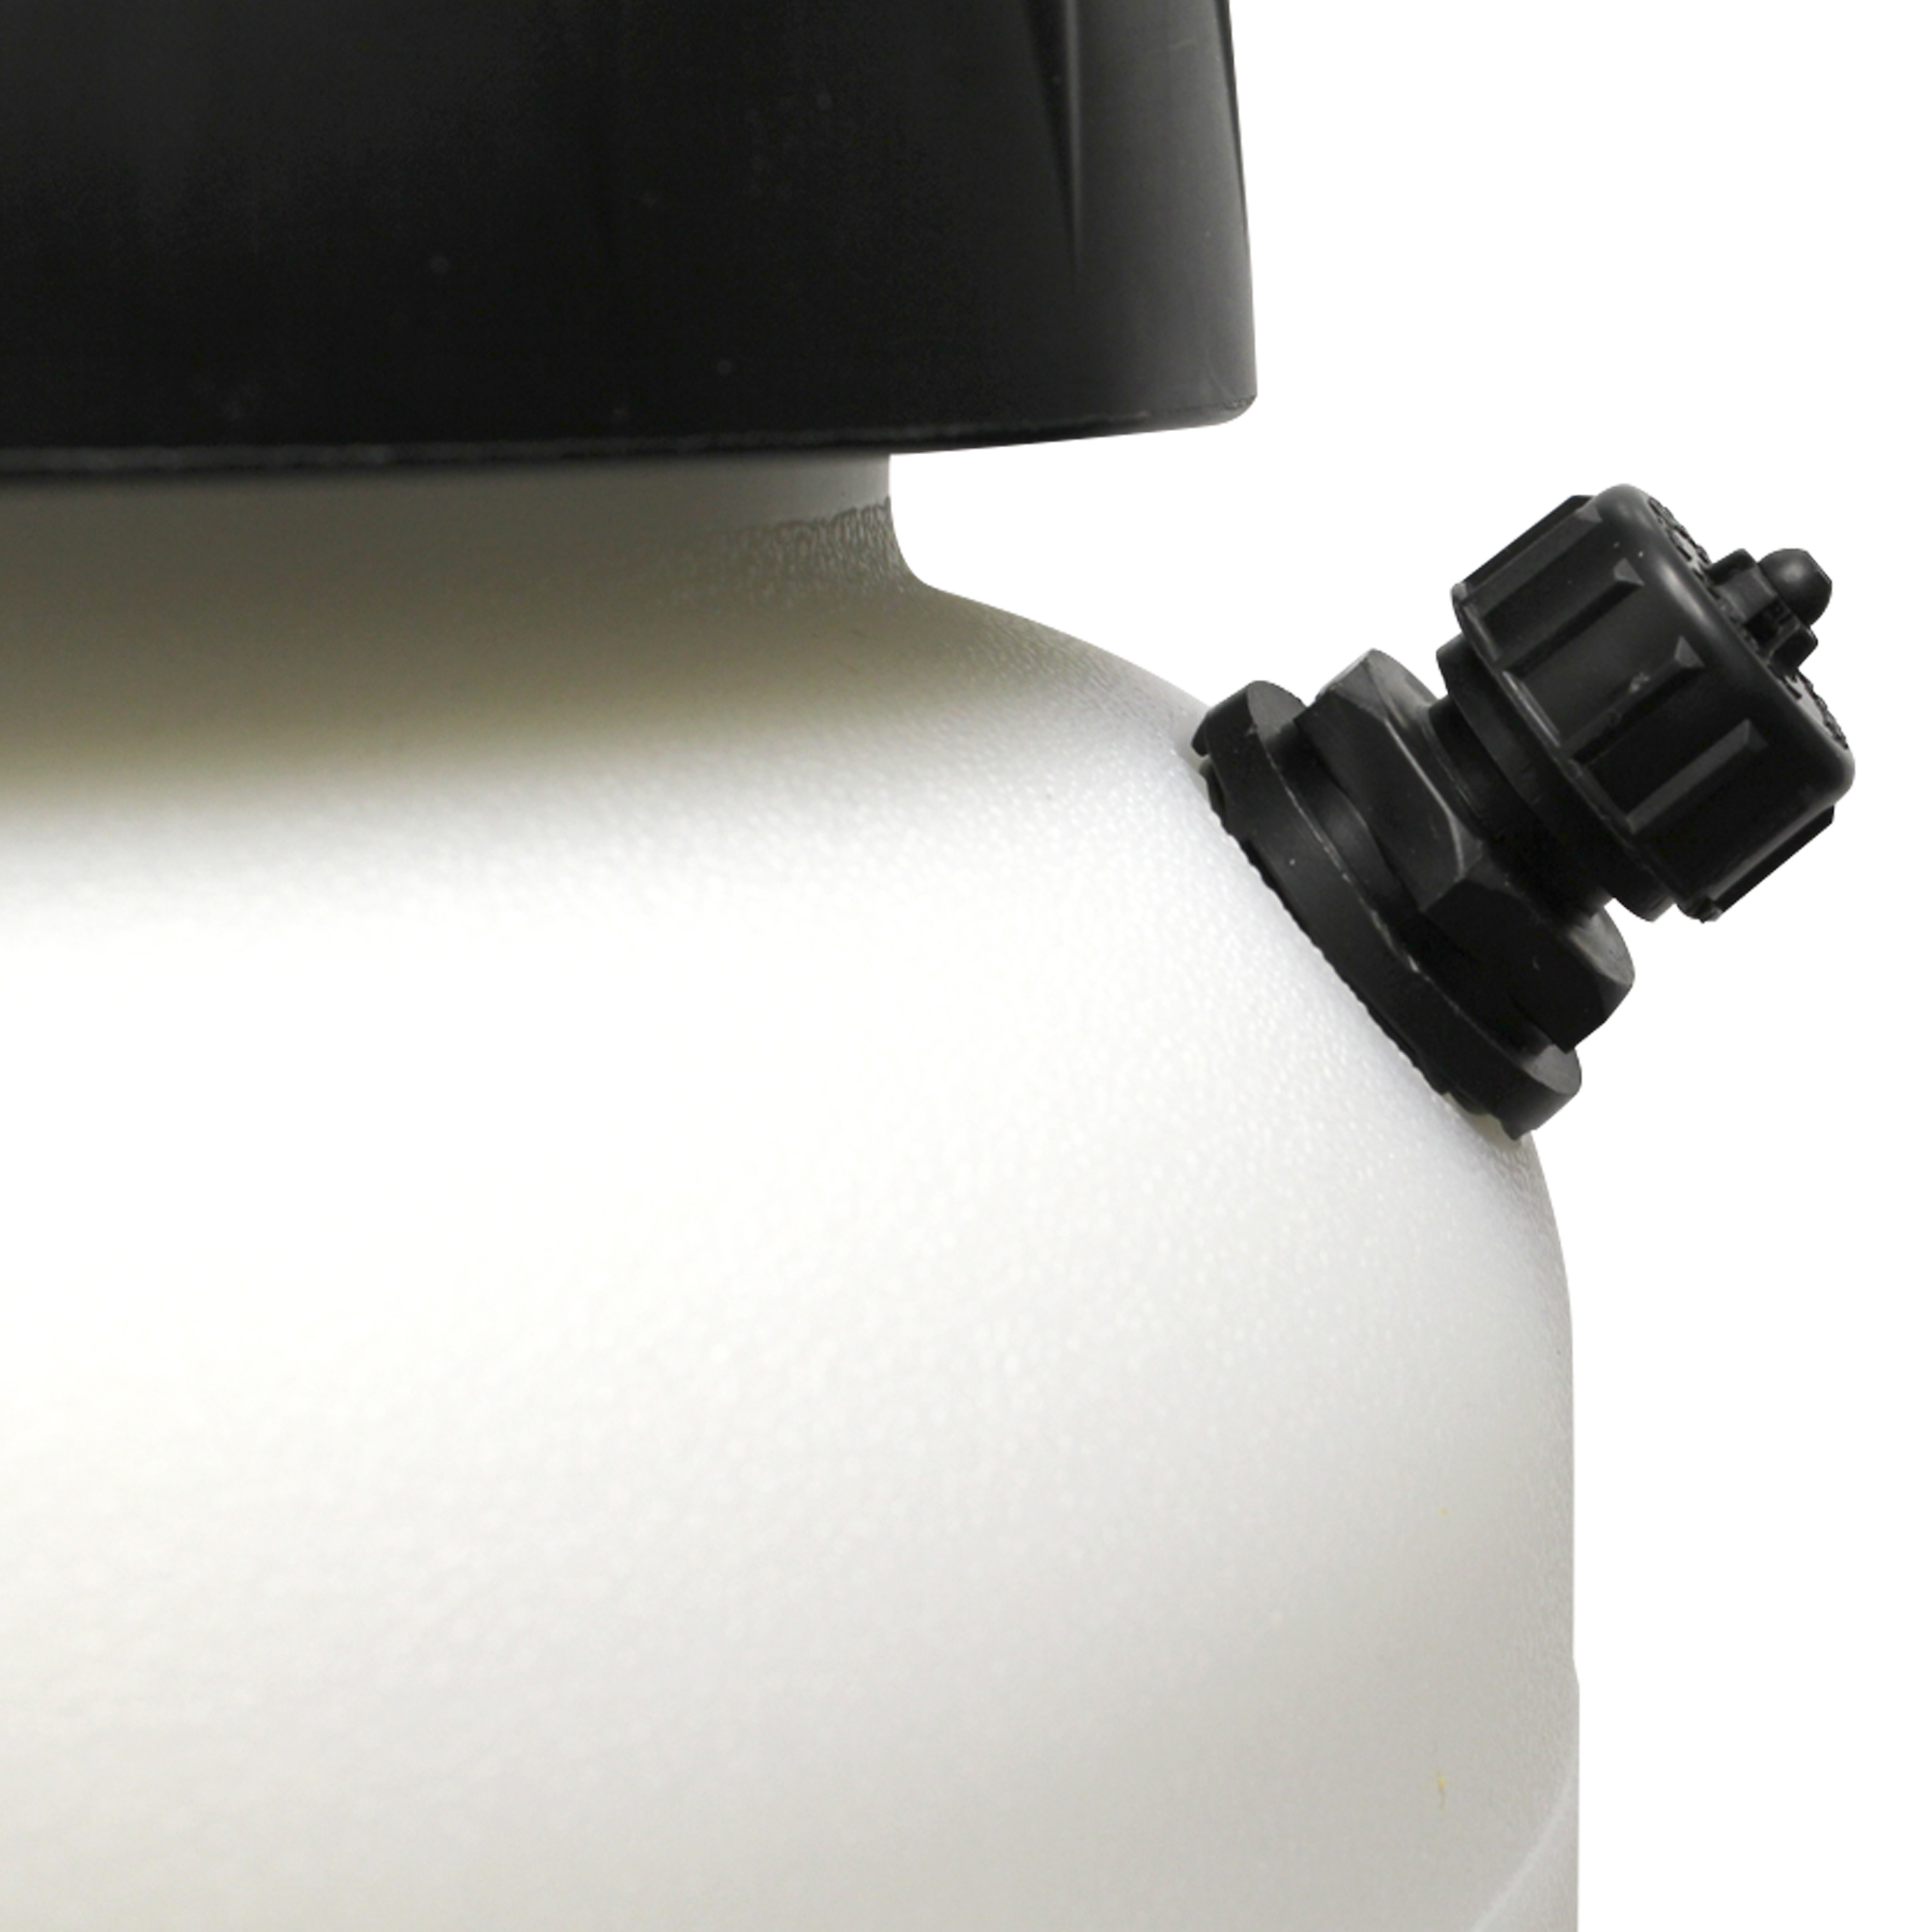
1. Hose to Tank
Discharge / Assembly
• Make sure white outlet tube is attached to outlet tube adapter
• Insert the outlet tube portion of the discharge assembly into the tank adapter
• Proper placement of white outlet tube
• Firmly insert the outlet tube adapter into the tank adapter. Lining up tab with notches on the tank adapter
• Firmly tighten the retaining nut to the tank adapter
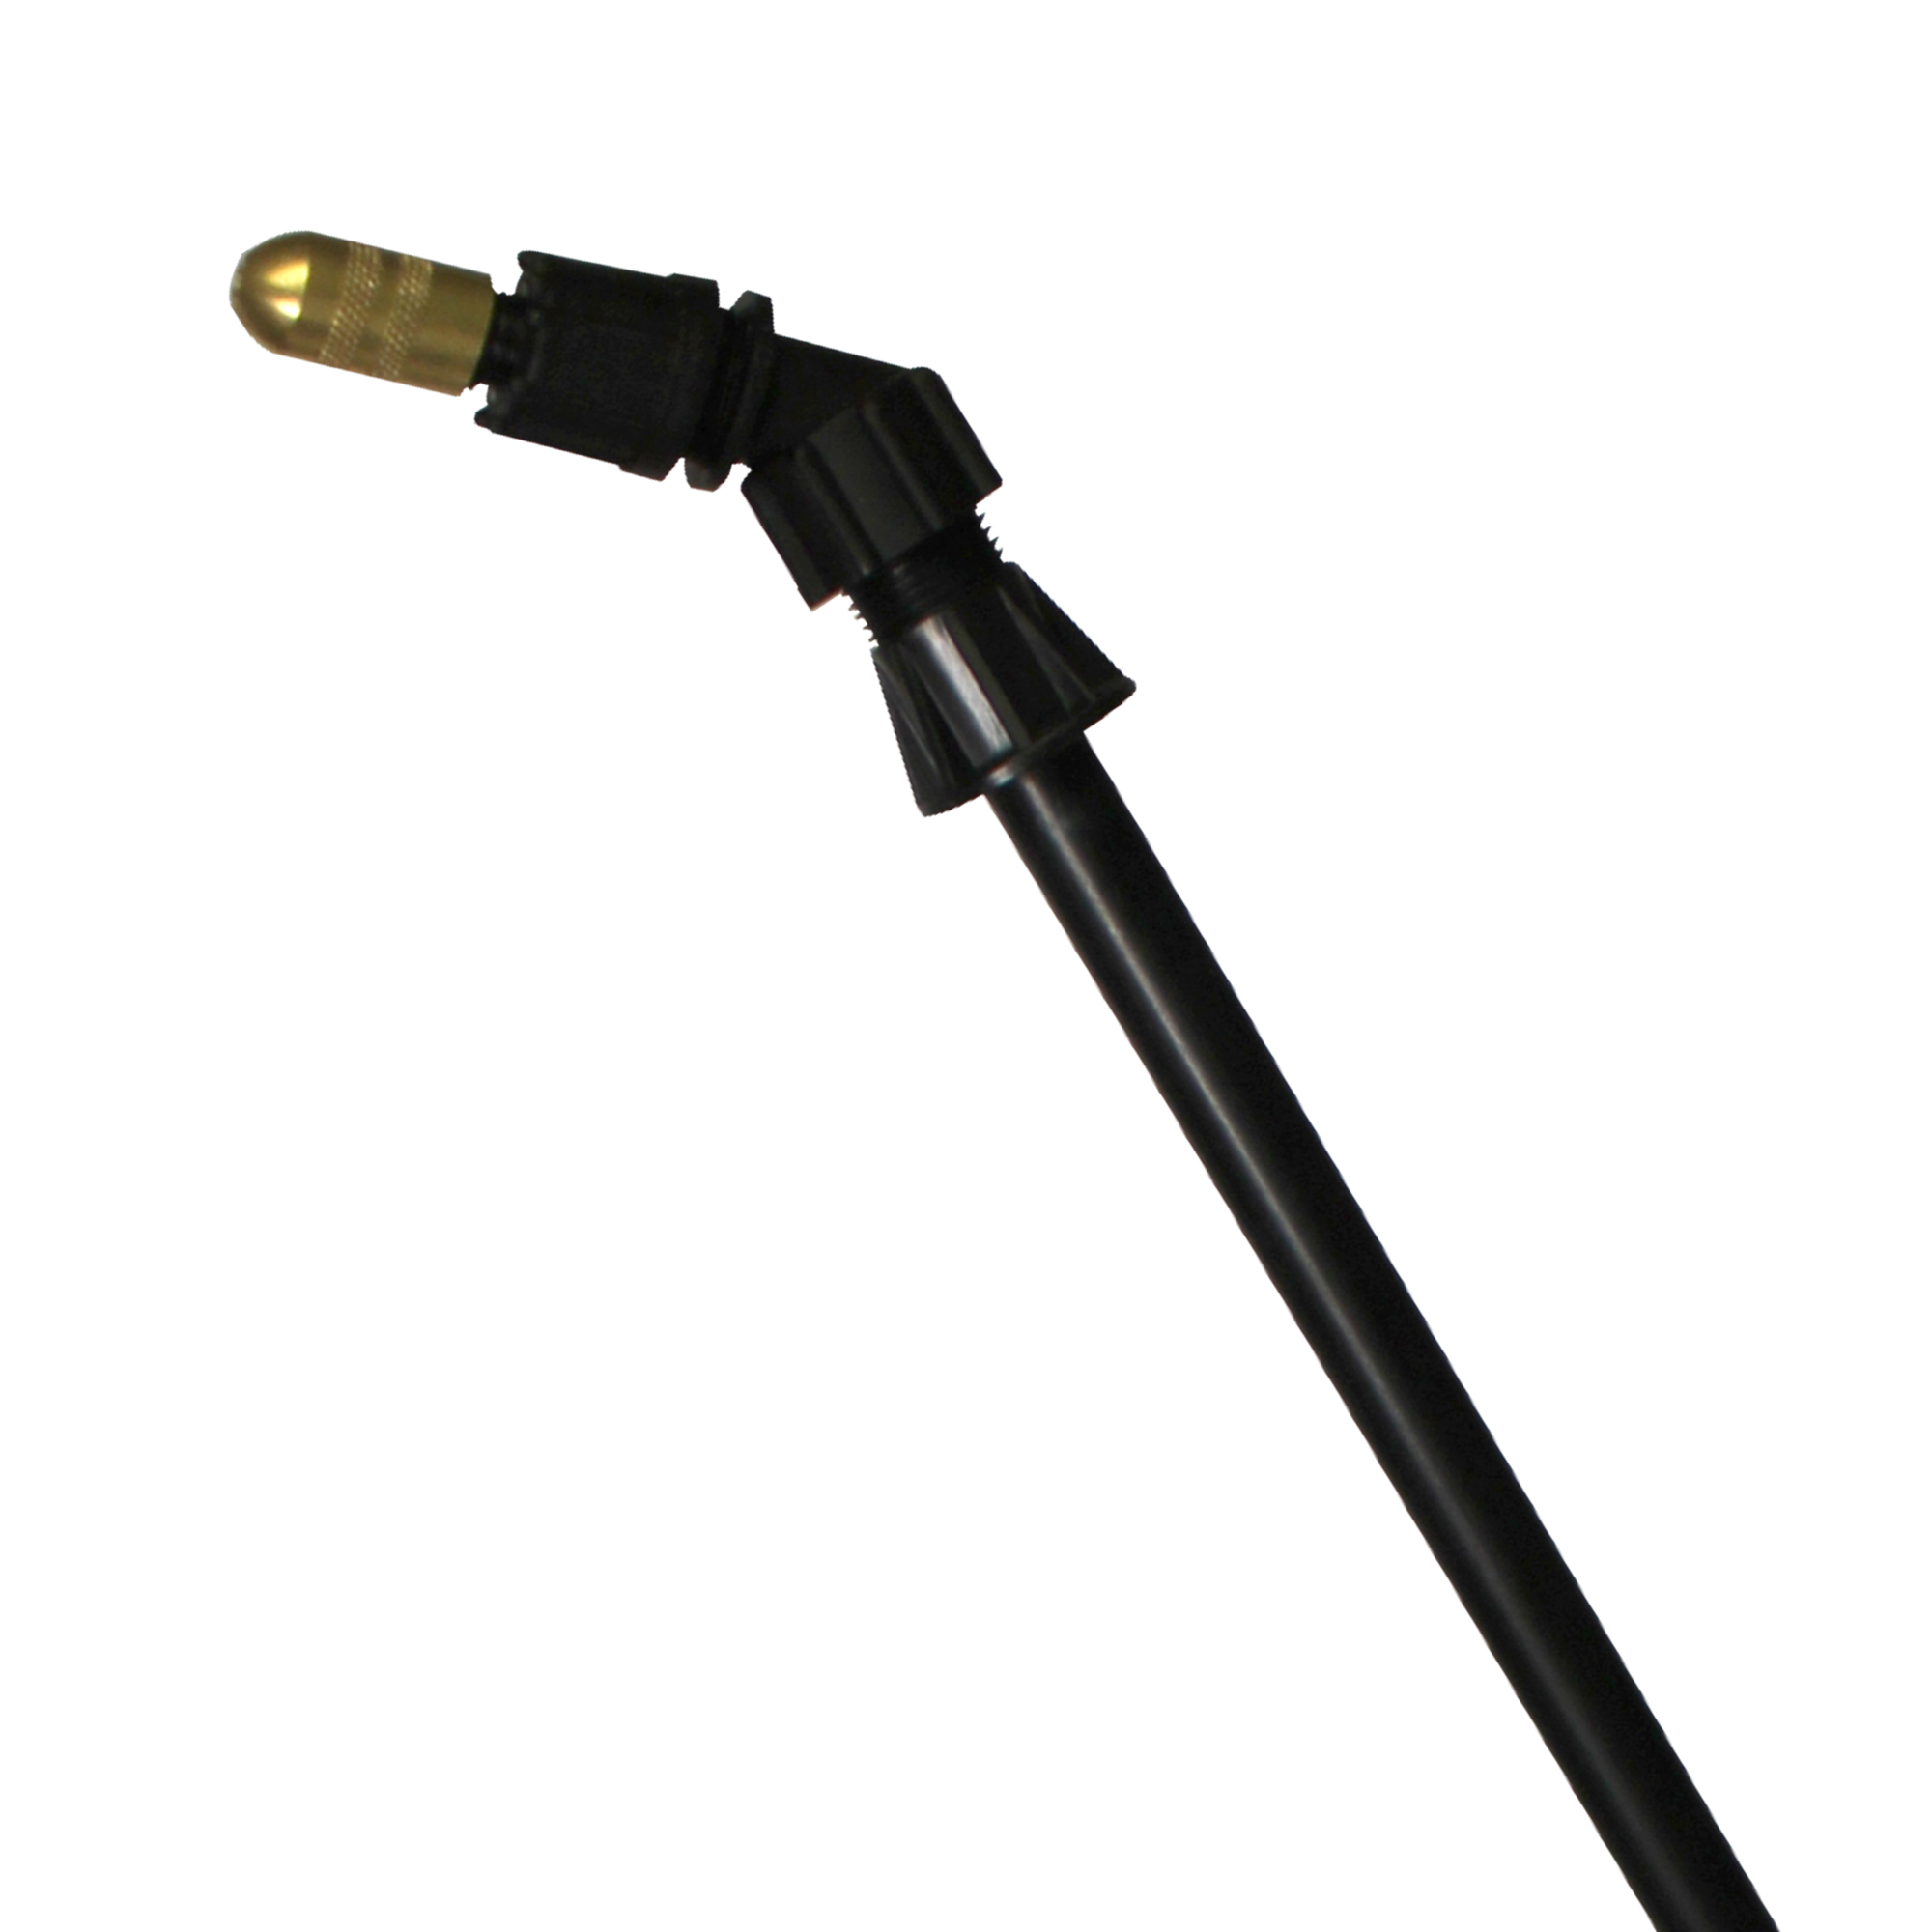
2. Assembly of Shut-off, Extension Wand and Nozzle
1) Screw nozzle assembly onto threaded end of the extension wand securely.
2) Insert unthreaded end of extension into shut-off assembly as shown and tighten retaining nut securely.
Nozzle Assembly
Unscrew the nozzle cap (1) from the nozzle body (3) with retaining nut (2) fastened tightly to the elbow (5). Unscrew the retaining nut (2). Push the nozzle body (3) with the nozzle gasket (4) out of the retaining nut (2). To reinstall the nozzle, reverse the above instructions.
Unscrew the retaining nut from the elbow and push the fan nozzle tip and gasket out of the retaining nut. To reinstall the nozzle, reverse the above instructions.
3. Filter
The filter helps prevent clogging while spraying. It is located on the end of the white tube inside your sprayer tank.To clean filter, remove the hose from the tank and lift out the outlet tube. Make sure the filter is positioned at the bottom of the tank as pictured.
4. Pre-Use Check
1) Do: Check tightness of hose nut to be sure hose is securely attached to the tank outlet.
2) Do: Inspect hose for deterioration, cracks, softness, or brittleness. If any of these conditions are found, replace hose before using. Replace with original manufacturer’s parts only.
3) Do: Remove pump (see Filling, Pressurizing and Spraying Instructions), inspect interior and exterior of tank for signs of deterioration of body and bottom. Any sign of deterioration indicates possible tank weakening and could result in explosive bursting under pressure. If any of these signs are found, discard tank immediately and replace. Do not attempt to patch leaks, etc., as this could result in serious injury.
4) Do: Follow Filling, Pressurizing and Spraying Instructions, except use water only (Pump plunger 10-20 strokes and inspect for leaks).
5) Do: Direct shut-off away from you and open to make sure discharge is not clogged.
6) Do: If unit passes this test, release pressure (see Pressure Releasing Instructions), empty tank, and proceed with Filling, Pressurizing and Spraying Instructions.
7) Do: Inspect all metal parts including the wand, nozzle and fittings for rust, corrosion and pitting. If any of these conditions are found, replace affected part with original manufacturer’s part before using.
5. Filling
1) Do: Turn pump handle counterclockwise and remove pump.
2) Do: Prepare spray solution following all directions and safety warnings on chemical label.
3) Do: Fill tank to no more than the proper gallon marker. Do NOT: overfill to accommodate pump.
4) Do: Check pump to make sure that no grass or dirt is stuck to barrel. Replace pump in tank and tighten securely.
6. Pressurizing and Spraying
Do: Turn handle clockwise to tighten. Push handle down, turn 1/4 turn counterclockwise to release.
Do: Pump until you feel resistance.
Do: Pump until you feel resistance.
7. To Release Pressure
1) Your sprayer is equipped with a pressure relief/release valve. To release pressure lift and hold the cap until air is completely exhausted, OR, turn the valve slowly counterclockwise until you hear air escaping and wait air is completely exhausted.
2) Do: Stay away from the sprayer until all air has escaped.
8. Care, Storage and Maintenance
1) Do: Rinse tank thoroughly with water only, empty, refill with water. Follow Filling, Pressurizing and Spraying Instructions, except pump unit only 8-10 strokes. Be sure that the wand and nozzle are thoroughly rinsed with water after each use.
2) Do: Open shut-off and allow water to run through discharge assembly.
3) Do: Release pressure (Follow Pressure Release Instructions), remove pump and empty sprayer.
4) Do: Store sprayer tank upside down, with pump removed, in a warm dry location.
5) Do: Periodically oil pump by dropping 10-12 drops of light oil down pump rod through opening in cover.
9. Fatigue-free spraying
For safety lock-off feature (no-spraying), pull up on handle and move red locking mechanism into lock-off position. To disengage, push down on handle and return red locking mechanism to neutral position. For lock-on feature (continuous spraying), push down on handle and move red locking mechanism into lock-on position. To disengage, push down on handle and return red locking mechanism to neutral position.
There are no reviews for this product yet. Be the first.
I'm going to be painting a walkway with concrete stain and was told to use a sprayer by Home Depot. Will this model work?
Chapin Pro Series 3 Gallon Sprayer (26031XP) would not be recommended for applying stain. Instead we would recommend you use the Chapin 3.5 Gallon Concrete Sprayer (1949).