By DoMyOwn staff
One step in most lawn programs that people forget about or don't even think of, is a lime application. Lime can really help improve the quality of your lawn. You first need to perform a soil test to know if your lawn needs it in the first place. In this video, Paul will go over how to apply lime in the yard as well as why you should put an application of lime down.
Things are looking really good back here. That fescue is growing in nicely. Really starting to take shape, so, pretty happy!
A lot of the weeds that I do have going on back here, they're starting to wilt and discolor, so, they're starting to kind of die out. I mean, fall is creeping in. The cool season grass is starting to grow more and a lot of that warm season weed growth is starting to die off and disappear.
Now it doesn't mean that they're going to completely disappear all on their own, I have to put forth some effort to knock them out of the yard and get rid of them, but once again, that's another project for another season.
And before we get into the meat of this video, it's been about two weeks since that last overseeding, and I've been watering it, per the schedule that I had mentioned in the last video. If you don't know what I'm talking about I'll link that in the description box below. You can go back and reference that.
But again, it's been about two weeks, it's grown nicely, time to give it a good cut.
Really seeing the potential of the back yard right here and the side with the Bradford Pears. Looking good.
Before moving on to the next step, actually had to, surprisingly shed a layer. It ugh, starts out pretty cool and then warms up pretty quickly. Especially when you're pushing a mower. On to the next step.
So on to the meat of today's topic, how to apply lime in the yard and why. Let's go over all of that.
First thing that you need to do to figure out if you have to put down an application of lime in the yard is perform a soil test. The extension office will tell you if your soil is either on the acidic side or the alkaline side. So, step number one perform a soil test.
Throwing down an application of lime in the yard that doesn't actually need it, it's a huge waste of time and money.
Plus if the soil is already pretty alkaline and you put down an application of lime, you could really effect the soil health and you'll must likely end up with a sickly yellow looking lawn.
My extension office and most extension offices out there, along with the customer service staff recommends that you test every year to see where your pH level is at. Once you get to that recommended pH level, you probably only need to lime once every few years.
Now the question is, what is the ideal pH level? Most extension offices out there recommend that it's slightly acidic, somewhere between a six and a seven. Once the pH drops below a six, certain nutrients like phosphorus, potassium and nitrogen and calcium, those become unavailable for proper good grass growth.
So that's where the lime swoops in and helps, putting an application of that down in the yard will help that soil pH to climb up to a six so that you get good growth out of your grass.
Spring is one of the best times to perform a soil test and your application of lime, you want to do that between fall and early spring.
Most local extension offices recommend that you get that application put down in the yard before the first expected frost.
When you go to actually start the application, a couple of things to keep in mind, don't put it down on a dry wilted lawn. Also avoid putting it down when it's really soggy and wet. And lastly don't lime during frosty weather.
After performing my soil test, my extension office recommended that I do about 25 pounds per thousand square feet. I've got about 3,500 square feet that I'm dealing with, so after doing a bit of math, I found out that I need about a hundred pounds for the entire back yard and the side with the Bradford Pears. And that's what I've got here. These are thirty pound bags. I got three of them, so I'm not quit at a hundred, but ninety pounds for the whole area, that should do the trick, so we'll open up these bags, get them dumped into my spreader, and get to putting it down!
You may have noticed that I threw the long sleeves back on and I was wearing gloves, for good reason. Make sure to wear your PPE, although, lime has not been proven to be toxic, it ha been known to cause some skin irritation. So, just protect yourself, throw on some long sleeves, long pants, wear gloves when your throwing it into your spreader and your putting it out in the yard.
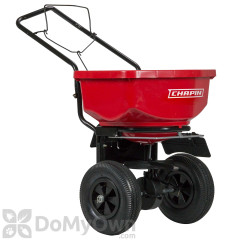
When it comes to actually putting the application down in the yard, never do it by hand. Use some kind of spreader to get it down into the yard.
After the application is down, keep pets and children out of the area for a good couple of days until that lime has a chance to settle down into the soil. Once again, it has not been found that lime is toxic to children or pets, but just er on the side of caution and just keep out of that area, once again, for a couple of days.
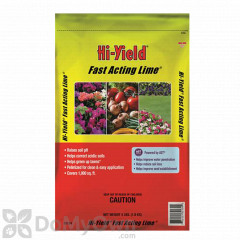
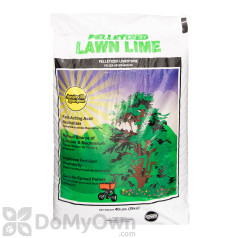
Lime mainly comes in two forms, pellets or powder, and it's usually categorized by either calcium based or dolomitic based. Dolomitic is typically best for lawns because it's rich in both calcium and magnesium, both of which are prime nutrients for a healthy yard.
On the surface calcium lime and dolomitic lime seem to be very similar products, but there are differences between the two. They're both made from pulverized lime stone and both are great at raising the pH in your yard, but the primary difference lies in the use of magnesium. And once again, magnesium is going to be found in your dolomitic type limes, it's going to contain large amounts of magnesium, along with calcium carbonate, while calcium based lime, only contains the calcium carbonate.
Spreaders all filled up! Matter of fact, I, I think this is the most I've ever had in this spreader, so this should be fun and a good work out. I calibrated it to the recommendation on the bag, so we're all set! Let's get to spreading!
Man, that was no easy task pushing around almost a hundred pounds of lime in the spreader. Workout for the week, done!
Lime application for the back yard and in the side with the Bradford Pears, check! Now typically you would turn on your irrigation system and water the lime down into the soil. But I've got rain forecast for later today, so once again, I'm going to let mother nature do the work for me!
That being said, lime is a slow acting mineral. So it will take months for it to really work down into the soil and start to work on changing that pH level, no matter what.
But once again, lightly watering the yard after you've put the application down will help speed up that process, it will help soak it down into the soil, so that it can get to work. Just don't flood the yard, you don't have to drench it and really get the soil soaked. A light watering to just dampen it should be sufficient.
So there you go! That's how you apply lime in the yard and a few reasons why you do it in the first place.
That's it for this video. I hope you found it helpful. Hit that thumbs up if you did. Leave any kind of comments or questions in the comments section below. You can always email those over to our customer service staff, or pick up the phone and give them a call.
If you're not already, subscribe to the channel by clicking this button, you can click this playlist to see all the videos in the Do My Own Lawn Care series, and click this playlist to see all the videos in the Do My Own Gardening series.
And as always, thanks for watching!