Use Trenching Method or Bait Stations

We understand for most folks, their home is usually their biggest investment. While you can save a lot of money by doing this treatment yourself, you should know undertaking your own termite treatment can be time consuming and labor intensive. If after reading through the instructions below you do not feel comfortable doing your own termite treatment, we recommend you hire a reputable professional pest control company that specializes in termite treatments to do the treatment for you.
The newer termiticide products are known as non-repellents, which is what we recommend using for Subterranean termite treatments. Non-repellent products offer three benefits over pyrethroids.
- Several of the non-repellent products offer up to a 10 year residuals
- Termites cannot detect the barrier around a structure so they will not seek out parts of the barrier that have been disrupted or missed Termites that cross through the barrier will pick up the residual on their bodies and transfer it back to the nest.
- Once in the nest the infected termites will transfer the residual to other termites in the colony through social interaction. After a period of time the non-repellent will have transferred through enough of the colony that it will be eliminated.
The treatment outlined below is general and is outlining a subterranean termite treatment on a home or structure that has been built on a monolithic slab. If you have a question about what that is, or if you have a home on a on a crawl space, a hollow block foundation, a structure on piers or a structure on a floating slab, we recommend you give us a call at 866-581-7378. We will walk you through the treatment process for your particular situation. Please remember to read the entire product label for complete instructions.
Planning:
Tools Needed:
- tape measure
Step 1:
Determine the linear footage around the exterior of your structure. You will need to measure the linear footage around the exterior of your structure to determine the amount of product needed. You can do this by using a tape measure and measuring how many feet long the front, back and each side of your structure is. This will give you the linear footage of the exterior of your structure.Step 2:
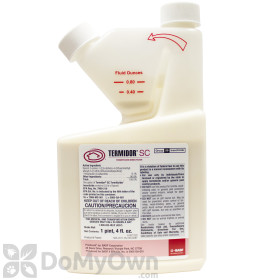
Choose your product. On most products that can be used as termite prevention barriers, we have listed how many linear feet each bottle of concentrate will cover on the individual product page. For instance, our best selling product is the 21 fl oz Termidor which will cover 60 linear feet of trench. If your home has 240 linear feet you will need 4 bottles of Termidor + 1 extra bottle of Termidor to spray down the backfill soil. Almost all concentrated termite prevention products require you to use 4 gallons of diluted solution for every 10 ft of linear trench. The actual amount of concentrated product added to the 4 gallons of water will vary by product.Trenching and drilling application
Tools Needed:
- Trench shovel or pick axe
- 5 gallon bucket
- Hand pump sprayer
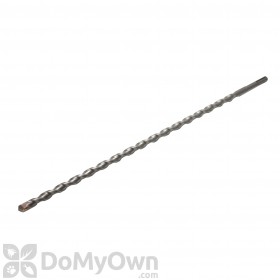
Tools needed if you have concrete interrupting areas that need to be trenched:
- Hammer drill (can be rented from home improvement stores)
- 1/2" x 18" or 1/2" x 24" concrete drill bit
- Disposable plastic or paper funnels
Dig trench:
Using the pick axe or trenching shovel, you should dig a 6" wide by 6" deep trench directly against the foundation of the exterior wall where the termites were found. The foundation of your house will make up one side of the trench. The trench should be at least 10 linear feet long or stretch down the entire exterior wall that was infested.Mark the trench:
Use small store purchase flags or simple sticks gathered from your yard to mark every 10 feet of the trench to make the application easy.Mix termiticide solution:
After the trench is completed you can mix the termiticide solution. We recommend using the 5 gallon bucket for this step. Fill the bucket with 4 gallons of water.Add the recommended amount of concentrated termiticide as per the product label. Stir the solution thoroughly with a paint stirrer or other tool until the concentrated liquid is evenly dispersed in the water. You will repeat this procedure for every 10 feet of trench.Pro Tip
Use a permanent marker to make a line that shows you the 4 gallon fill up mark to make measuring the water simple.
Apply solution to the trench:
You will need to pour 4 gallons of finished solution in every 10 linear feet of trench. Be sure to pour slowly to make sure the solution is evenly distributed.Treat the soil that was removed from the trench:
As you are moving the soil you removed from the trench back into the trench you need to make sure it is also treated with termite solution. Using the hand pump sprayer loaded with one gallon of finished termiticide solution, spray down the soil as you are replacing it back into the trench. Spray the soil just until moist.Drilling through concrete:
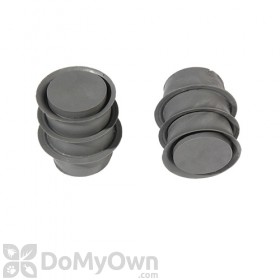
If concrete such as a carport slab or sidewalk is against the foundation in the area where you need to treat, you will be required to drill through the concrete to apply the termiticide solution to the soil. Using the hammer drill with a 1/2" x 18" concrete drill bit, drill holes every 12" into the concrete along the foundation wall.You are not only drilling through just the concrete here, but also as deep as you can into the dirt. The deeper the better. Once the holes are drilled, you fill at the same rate you did the trench, 4 gallons per 10 feet. If you drilled the holes 12 inches apart, then you would have 10 holes over 10 feet that you are trying to fill with 4 gallons. This works out to be a little less than half a gallon per hole. To fill these I would recommend using the one gallon sprayer on a "pin stream" setting so you can force the liquid down the hole and not splash it everywhere. You can also use a funnel and pour the termiticide down the holes. It is difficult to get 4 gallons per 10 feet in the holes, so it is important that you use a long drill bit, at least 18" long so you can bore out enough dirt to hold the termiticide. Sometimes the ground is slow to soak up the termiticide you place in the holes. You may need to fill the holes, then go work on something else for an hour, come back and fill them again, go work on something else... 3 to 4 times to get the proper amount down the holes. Once the holes are filled all you need to do is patch them with a concrete patch filler you can buy at a home improvement or hardware store or you can use our Trebor plugs that will close the hole with no concrete mess.
Pro Tip
Do not disrupt the termite prevention barrier if at all possible after the application is finished. It is best to avoid planting flowers, shrubs or bushes in the same area where you have trenched and treated around the structure. If you find yourself having to do a home repair that disrupts the barrier, you will need to retrench and treat the disrupted area again.
If you choose to use a concentrated non-repellent product it is important that you have a dedicated sprayer just for this use. If you use herbicides or other insecticides in the sprayer, you could leave behind a residue that could adversely affect the non-repellent properties of the concentrate.
Products needed for Prevention Option 1

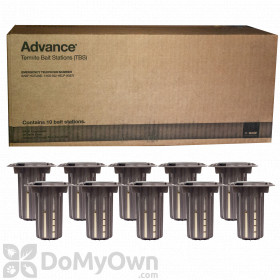
Termite Bait Stations
Tools Needed:
- 2 3/4 in. hand or electric auger or post hole digger
Step 1: Place the Termite Bait Stations
In most cases, termite bait stations should be place around the perimeter of the structure at intervals of approximately 8 to 10 feet. If areas exist where one or more of the above conditions are present, station placement should be more concentrated (stations placed at closer intervals).- Dig holes about 8-10 inches deep, watching for water pipes, and gas or utility lines. The holes should be 2-4 inches deeper than the stations bottom to allow water to drain from the station when it rains. NOTE: If you are not sure where your gas or utility lines are located you can call 811 and have a free line assessment performed on your property.
- Stations should be installed at a distance of about 1 to 2 feet from the foundation. This will help avoid any previous or subsequent barrier and soil treatments.
- When placing the station into the hole, place the station against one side of the hole with the lip of the station on top of the soil and then replace the soil to fill in the pocket on the other side of the station. This will insure that the side of station are in direct contact will the soil.
- The lip of the station should be flush with the ground.
- Using a hand sketched map of your home, mark where each station is located so you will be able to find them later.
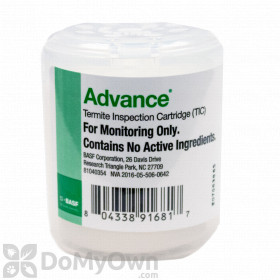
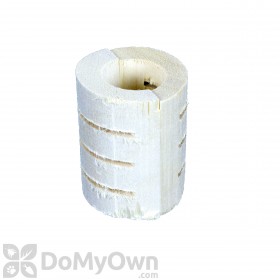
Step 2: Monitoring with Pre-Bait
Monitoring is critical during all stages of the baiting process. At this stage, each bait station should contain an inactive "pre-bait" - usually a piece of wood or inspection cartridge. Once you have placed inactive bait stations containing a piece of wood or inspection cartridge in the ground, it will take time before the termites actually find the bait, since they are not immediately "attracted".- Research has shown that it can take a termite colony between 1 to 5 months to find a bait station in the southern states, and up to a year or more in northern states. Patience and consistent monitoring (about every 3 months) key.
- The pre-bait should be replaced with active bait as soon as it shows signs of feeding: mud tubes in the station, live or dead termites.
- Putting out the toxic bait too soon would result in killing off the very workers needed to establish the feeding cycle.
Step 3: Monitoring with Active Termite Bait
- Once the active bait is in place, continue to monitor the bait station every 3 months, keeping a record of when you have checked them, and any observations.
- You are looking for feeding activity. As long as feeding activity is evident, the active bait may be left in place.
- Once feeding activity has stopped however, it should be assumed that the colony has been eliminated, and the active bait may again be replaced with a monitoring device such as a piece of wood or inspection cartridge.
Step 4: The process is then repeated with monitoring the pre-bait on a monthly basis and replacing with active termite bait as needed to prevent and manage future infestations.
Products needed for Prevention Option 2
/1331_with_trelona_(003).jpg.thumb_280x280.jpg)
/Trelona_6_Pack_3_(002).jpg.thumb_280x280.jpg)
Outdoor Termite Prevention Tips
- Trim all shrubs, bushes and other dense greenery away so that they do not touch your structure.
- Rake back mulch at least 6 inches away from the foundation.
- Don't leave firewood near your home, as it is a magnet for termites. If you do keep firewood outside your structure during the winter, keep it raised off the ground and protected from water if at all possible.
- Remove all lumber, tree stumps and other kinds of loose wood from the perimeter of your structure.
- Fix any leaky pipes and eliminate any standing water near your structure. Subterranean termites cannot live on wood alone, they require moisture as well.
- Keep gutters and downspouts free of accumulated leaves and debris. Clogs and obstructions can attract termites.
- Seal as many cracks, crevices and holes in your structures foundation, as they may provide a handy access point for termites.